
Quickstart
Set up your first limited product in one sitting. Do the steps in this order. Checkout stays off until you turn it on, so you can check the product page first.
Install on the Shopify App Store
Before you start
Section titled “Before you start”- Staff access to Shopify Admin → Apps and the theme editor
- The customer tags you will use, for example
goldandmember - One product to limit, and a customer who already has one of those tags
- A plan approved on Shopify’s plan page, if Shopify asks for one — see Billing
1. Install and open the app
Section titled “1. Install and open the app”Install Launch Lock and open Apps → Launch Lock. The app loads in a new browser tab. See Install.
The first screen is Rule sets, with a Setup card. Work through that card; this guide is the same list with the detail filled in.
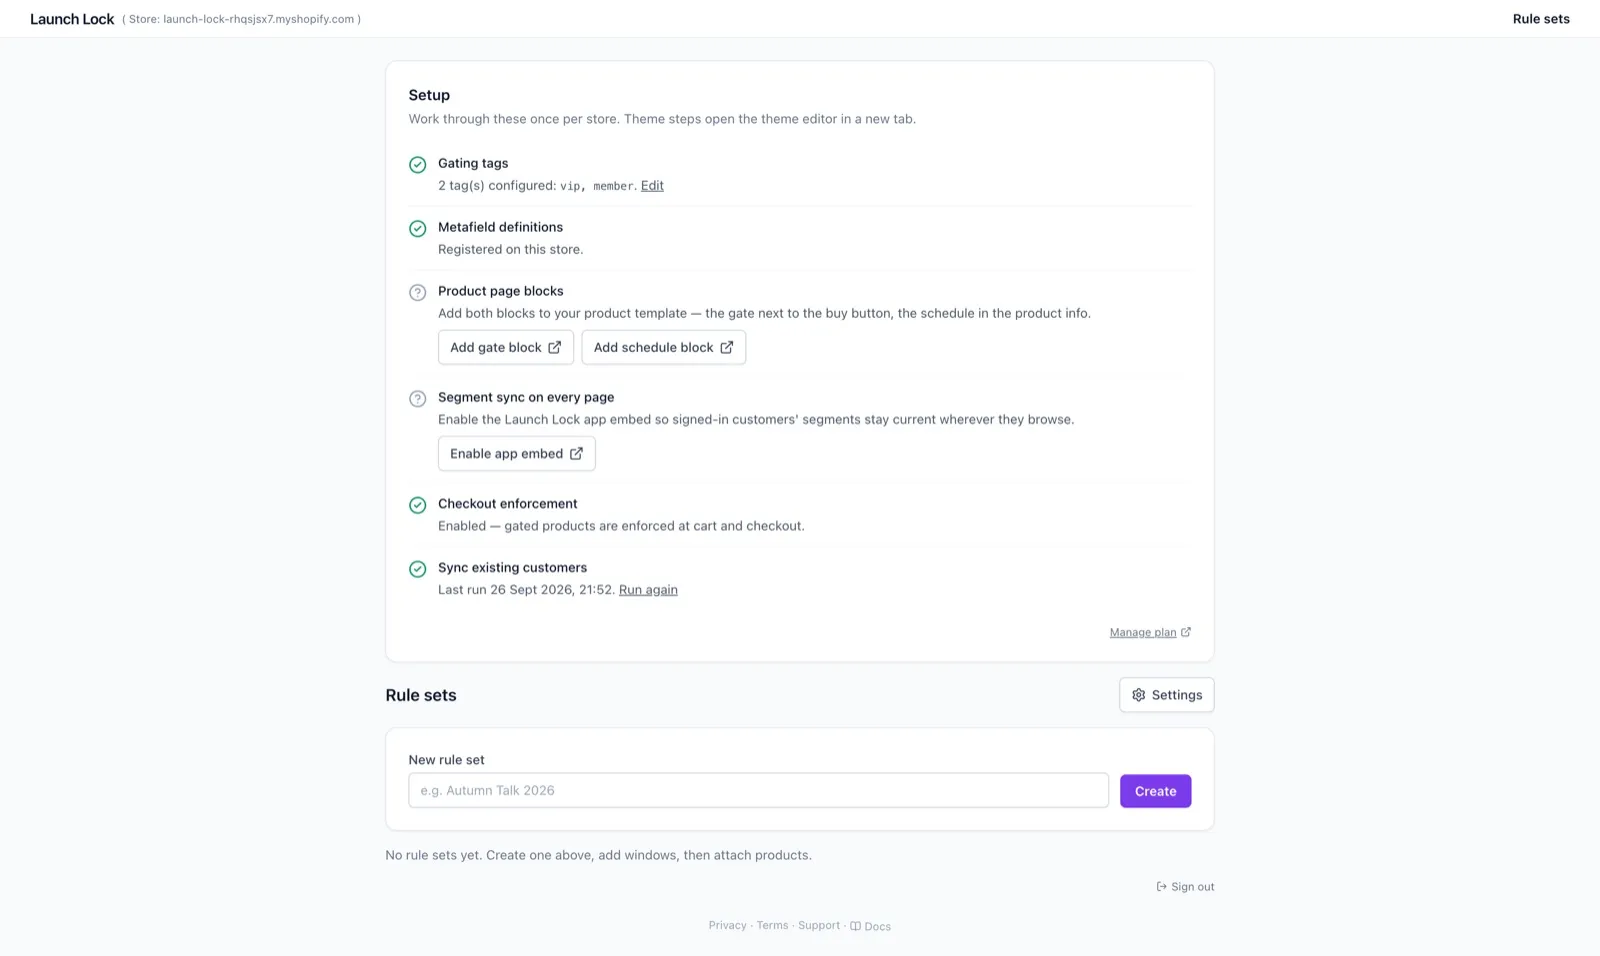
Setup card on the rule sets page. Theme steps stay as actions because the app cannot see the theme editor.
2. Add gating tags
Section titled “2. Add gating tags”Open Settings. Under Gating tags, enter one tag per line and click Save tags. A window can only use these tags. Only these tags are saved for checkout. Other tags on a customer are ignored.
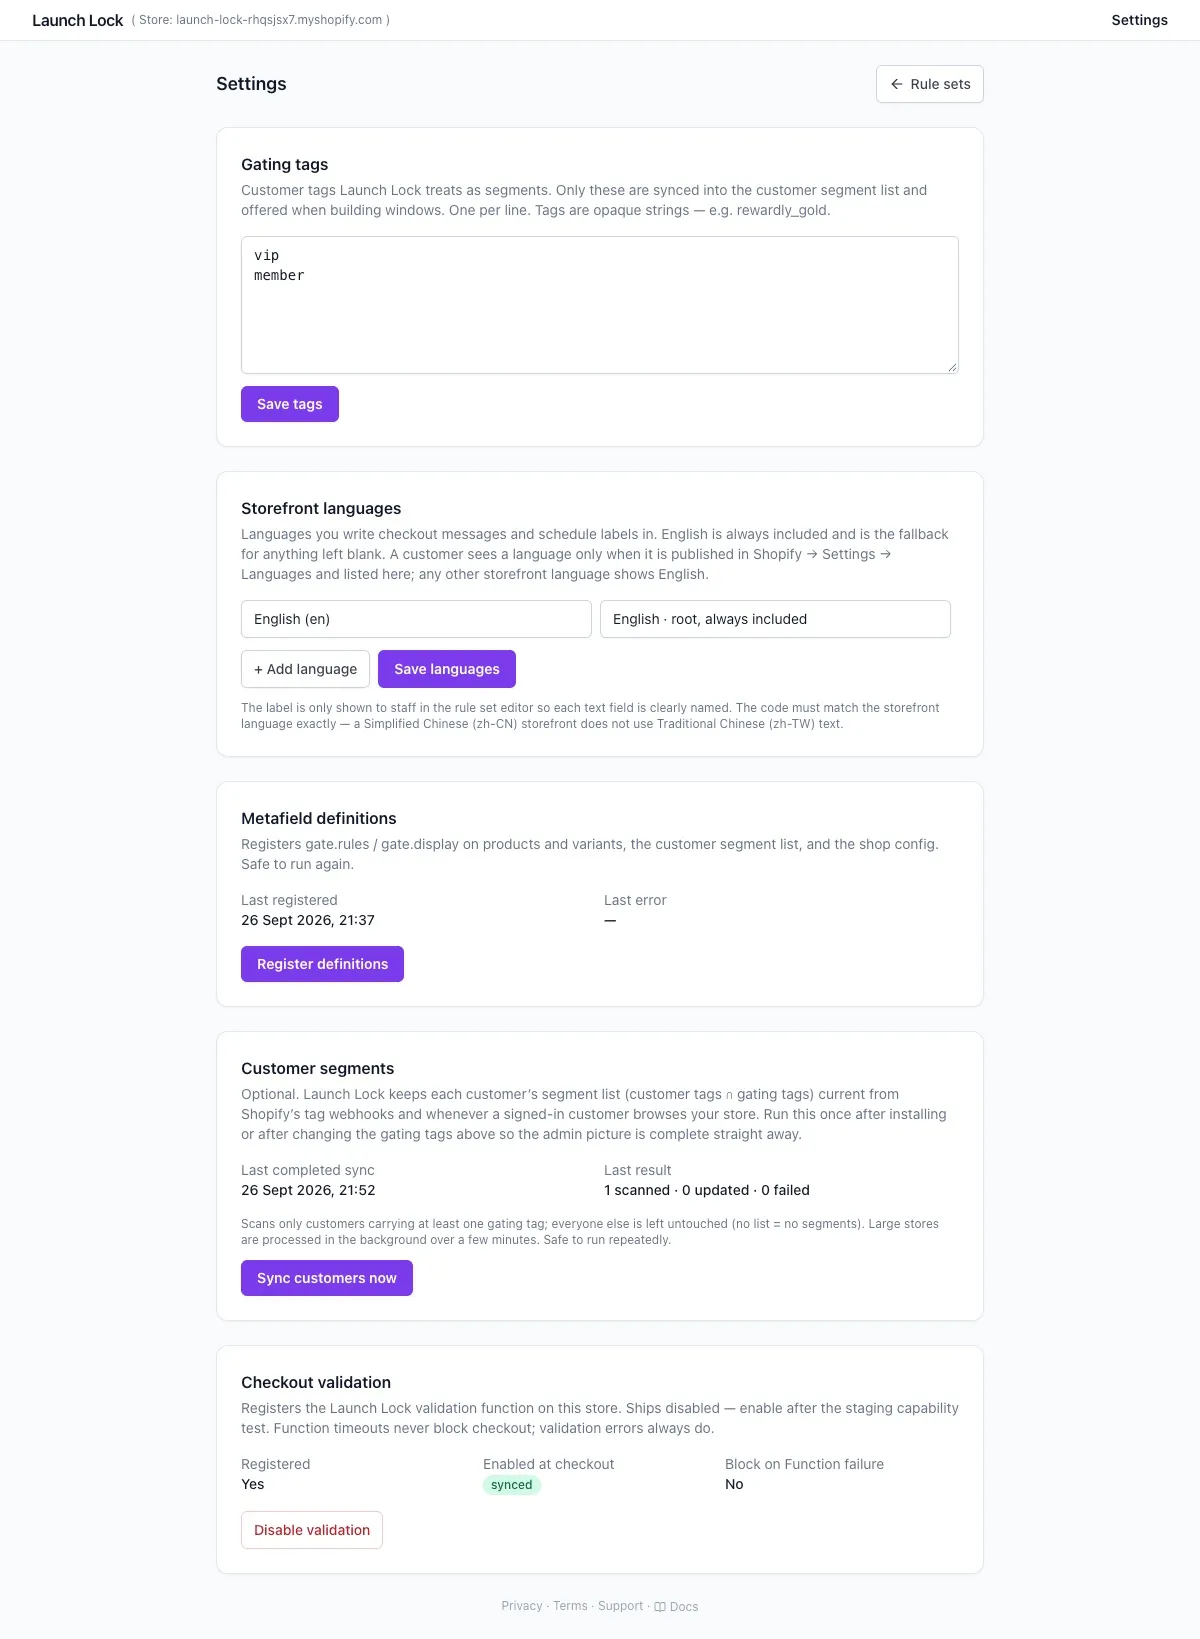
Gating tags, one per line, and Customer segments with Sync customers now.
3. Create a rule set
Section titled “3. Create a rule set”Back on Rule sets, type a name and click Create.
On the rule set:
- Leave Require sign-in to buy ticked if guests must not check out.
- Add a window: a name, an Opens on date, and at least one tag (or Signed-in customers without a tag).
- Click Seed from windows, then edit the English and 繁體中文 schedule labels.
- Click Save & compile.
A later window does not include earlier tags on its own. If Gold may also buy when Members opens, tick gold on the Members window too. See Rule sets.
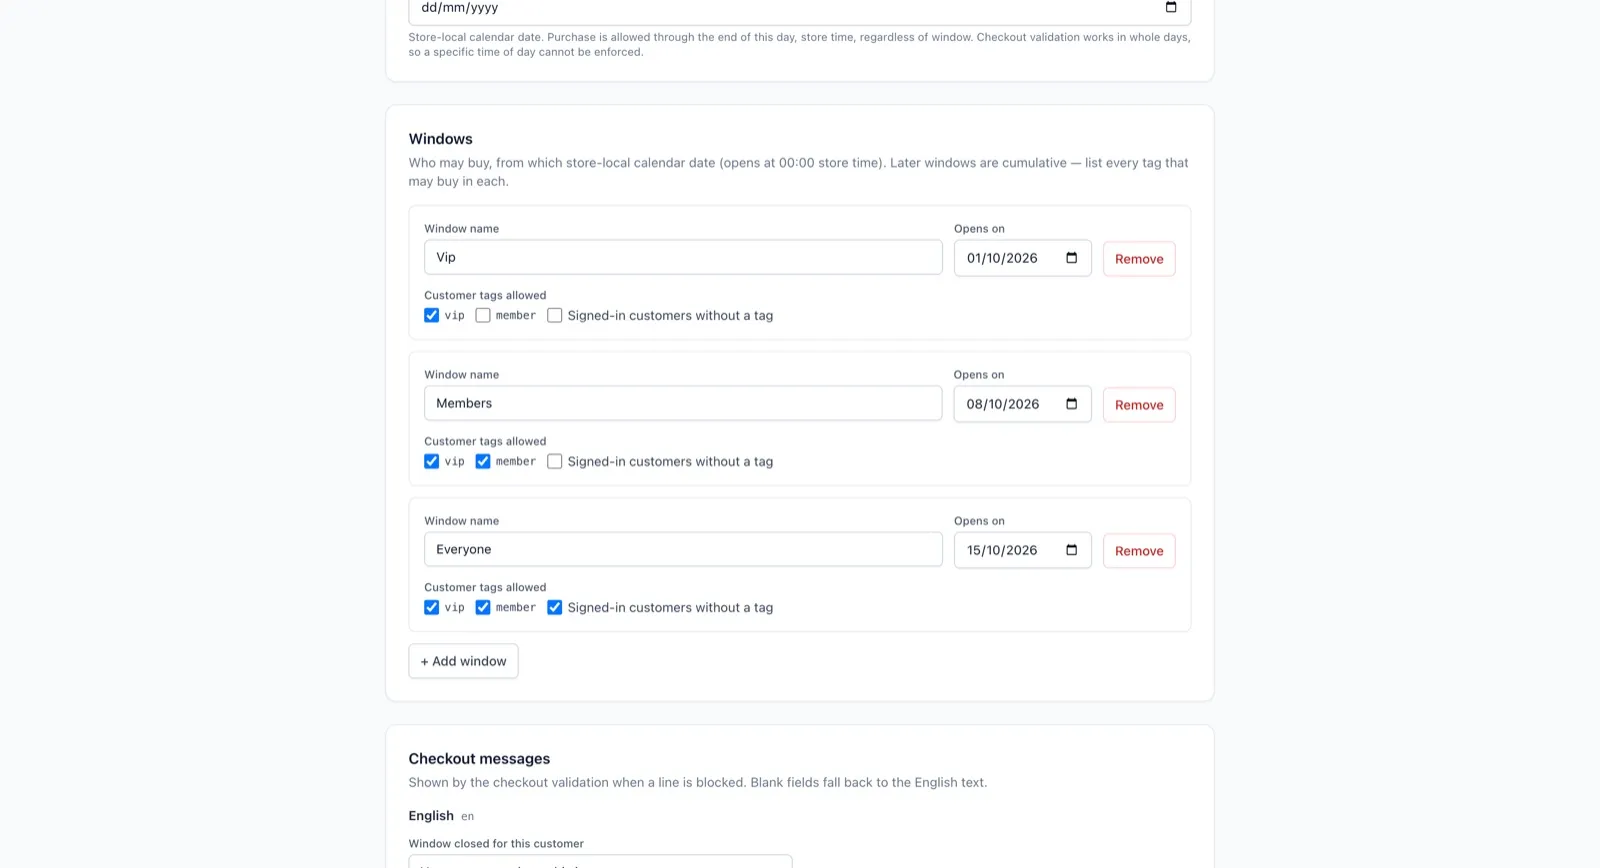
Each window has a name, an Opens on date, and the customer tags ticked. Later windows include the earlier tags.
4. Attach the product
Section titled “4. Attach the product”On the same page, under Products, search by title and click Add.
- Whole product — one maximum and minimum, shared by every variant.
- One variant on its own — that variant has its own limit. The rest of the product keeps the product limit.
Save & compile saves the rules onto the product. The product row should show synced.
5. Add the theme blocks
Section titled “5. Add the theme blocks”On the Setup card:
- Add gate block — place Launch Lock gate next to the buy button.
- Add schedule block — place Launch Lock schedule in the product info.
- Enable app embed — turn on Launch Lock segment sync. Customers do not see it. It updates a signed-in customer’s tags on every page.
See Theme editor.
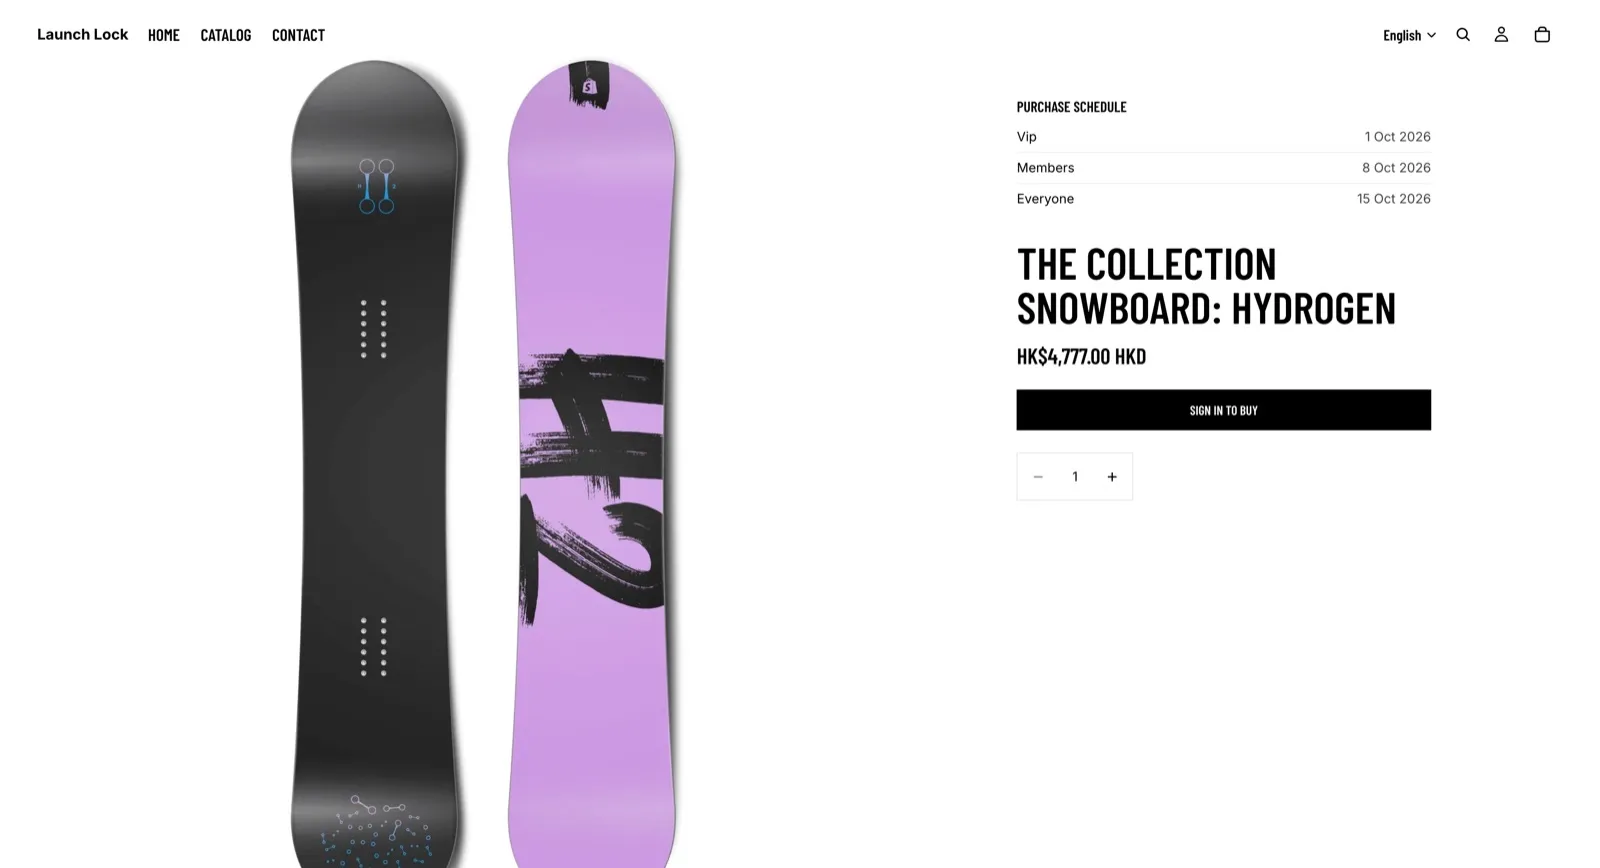
Logged out, the schedule lists each window and the buy button is replaced by Sign in to buy.
6. Sync existing customers
Section titled “6. Sync existing customers”Settings → Customer segments → Sync customers now. The page shows Syncing… until it finishes. It only updates customers who already have a gating tag.
After this, when you add or remove a tag on a customer in Shopify Admin, Launch Lock updates that customer on its own. The button is for people who were tagged before you saved the list.
7. Turn on checkout validation
Section titled “7. Turn on checkout validation”Settings → Checkout validation → Enable validation. Until you do this, the product page can hide the buy button and checkout will still allow the order.
Check it
Section titled “Check it”| Who is looking | Product page | Checkout |
|---|---|---|
| Logged out, sign-in required | Sign in to buy | Blocked with the same sentence, and the product title |
| Signed in, window still closed | Buy button dimmed. The schedule explains when it opens | Blocked with your “not yet” message |
| Signed in, window open | Buy button works | Allowed, then the max, min, and deadline still apply |
| A product on no rule set | Normal buy button | Not affected |
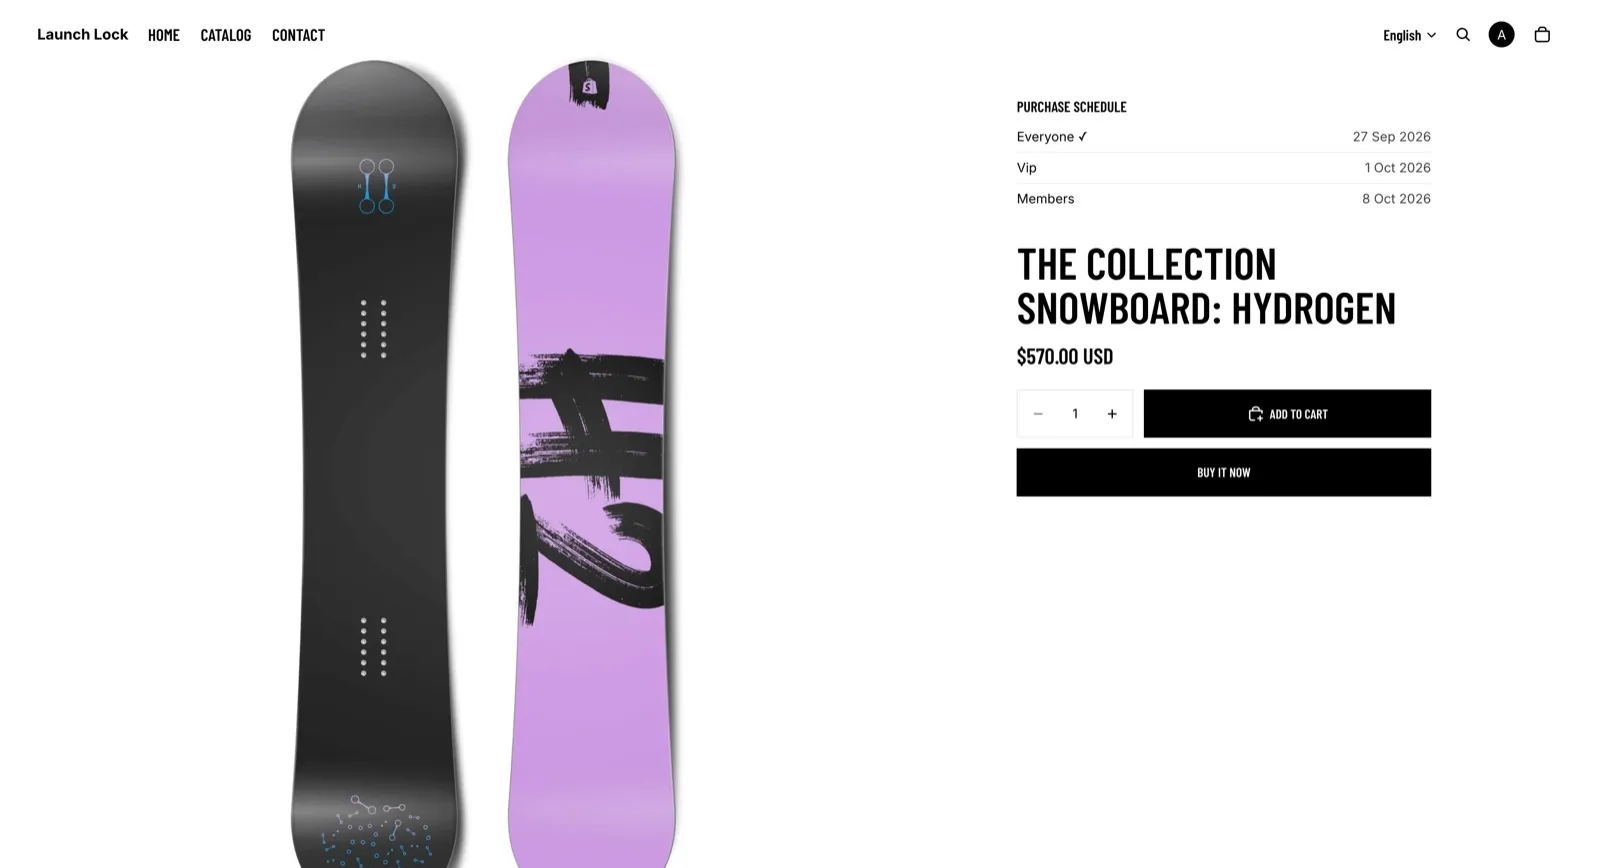
Signed in, with the window open. The theme buy button is back and the schedule stays visible.
Sales at the till are never blocked. That is on purpose, so staff can sell in person.
Install on the Shopify App Store
- Rule sets — deadlines, quantity, both languages
- Theme editor — preview each state without extra customer accounts
- Troubleshooting — if the buy button or a tag does not match what you expect